Making a Menu with Arcade’s GUI#
This tutorial shows how to use most of arcade’s gui’s widgets.
Step 1: Open a Window#

First, let’s start a blank window with a view.
 1"""
 2Menu.
 3
 4Shows the usage of almost every gui widget, switching views and making a modal.
 5"""
 6import arcade
 7
 8# Screen title and size
 9SCREEN_WIDTH = 800
10SCREEN_HEIGHT = 600
11SCREEN_TITLE = "Making a Menu"
12
13
14class MainView(arcade.View):
15    """ Main application class."""
16
17    def __init__(self):
18        super().__init__()
19
20    def on_show_view(self):
21        """ This is run once when we switch to this view """
22        arcade.set_background_color(arcade.color.DARK_BLUE_GRAY)
23
24    def on_draw(self):
25        """ Render the screen. """
26        # Clear the screen
27        self.clear()
28
29
30def main():
31    window = arcade.Window(SCREEN_WIDTH, SCREEN_HEIGHT, SCREEN_TITLE, resizable=True)
32    main_view = MainView()
33    window.show_view(main_view)
34    arcade.run()
35
36
37if __name__ == "__main__":
38    main()
Step 2: Switching to Menu View#
For this section we will switch the current view of the window to the menu view.
Imports#
First we will import the arcade gui:
Shows the usage of almost every gui widget, switching views and making a modal.
"""
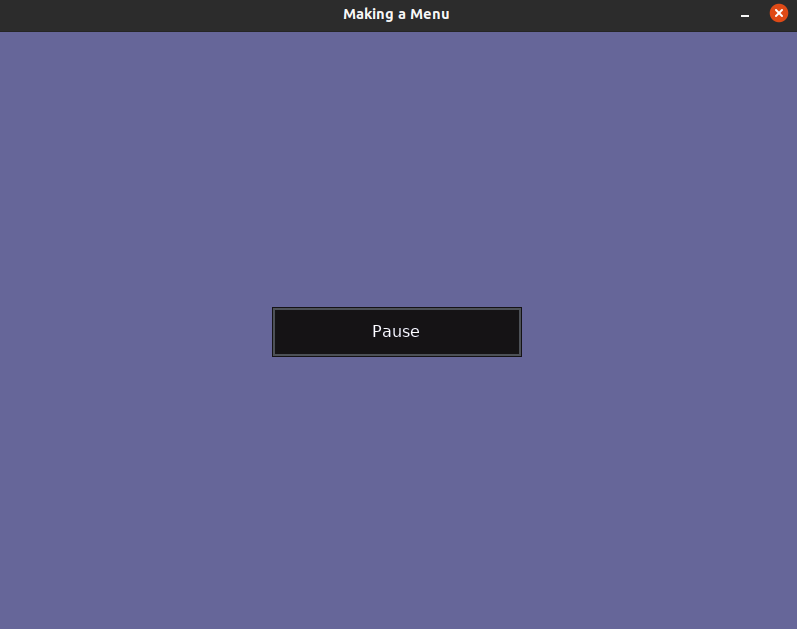
Modify the MainView#
We are going to add a button to change the view. For drawing a button we would
need a UIManager.
    """This is the class where your normal game would go."""

    def __init__(self):
        super().__init__()
After initialising the manager we need to enable it when the view is shown and disable it when the view is hiddien.
    def on_show_view(self):
        """ This is run once when we switch to this view """
        arcade.set_background_color(arcade.color.DARK_BLUE_GRAY)

        # Enable the UIManager when the view is showm.
        self.manager.enable()
    def on_hide_view(self):
        # Disable the UIManager when the view is hidden.
        self.manager.disable()
We also need to draw the childrens of the menu in on_draw.
Drawing Children’s of the Manager#def on_draw(self): """ Render the screen. """ # Clear the screen self.clear() # Draw the manager. self.manager.draw()
Now we have successfully setup the manager, only thing left it to add the button.
We are using UIAnchorLayout to position the button. We also setup a function
which is called when the button is clicked.
Initialising the Button#self.manager = arcade.gui.UIManager() switch_menu_button = arcade.gui.UIFlatButton(text="Pause", width=250) # Initialise the button with an on_click event. @switch_menu_button.event("on_click") def on_click_switch_button(event): # Passing the main view into menu view as an argument. menu_view = MenuView(self) self.window.show_view(menu_view) # Use the anchor to position the button on the screen. self.anchor = self.manager.add(arcade.gui.UIAnchorLayout()) self.anchor.add( anchor_x="center_x", anchor_y="center_y",
Program Listings#
menu_02.py Full Listing ← Where we are right now
menu_02.py Diff ← What we changed to get here
Step 3: Setting Up the Menu View#
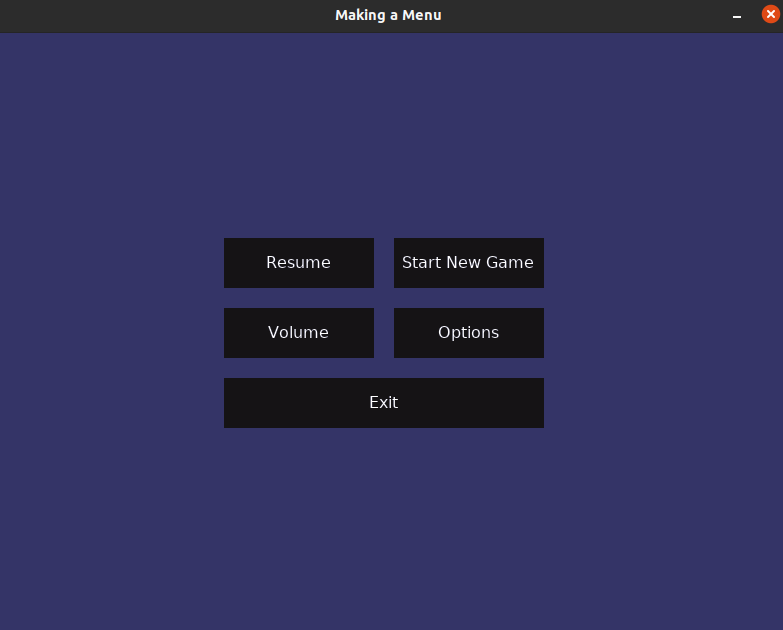
In this step we will setup the display buttons of the actual menu. The code
written in this section is written for MenuView
Program Listings#
menu_03.py Full Listing ← Where we are right now
menu_03.py Diff ← What we changed to get here
Step 4: Configuring the Menu Buttons#
We basically add event listener for on_click for buttons.
Adding on_click Callback for Resume, Start New Game and Exit#
First we will add the event listener to resume, start_new_game and exit button as they don’t have much to explain.
        self.main_view = main_view

        @resume_button.event("on_click")
        def on_click_resume_button(event):
            # Pass already created view because we are resuming.
            self.window.show_view(self.main_view)

        @start_new_game_button.event("on_click")
        def on_click_start_new_game_button(event):
            # Create a new view because we are starting a new game.
            main_view = MainView()
            self.window.show_view(main_view)

        @exit_button.event("on_click")
Adding on_click Callback for Volume and Options#
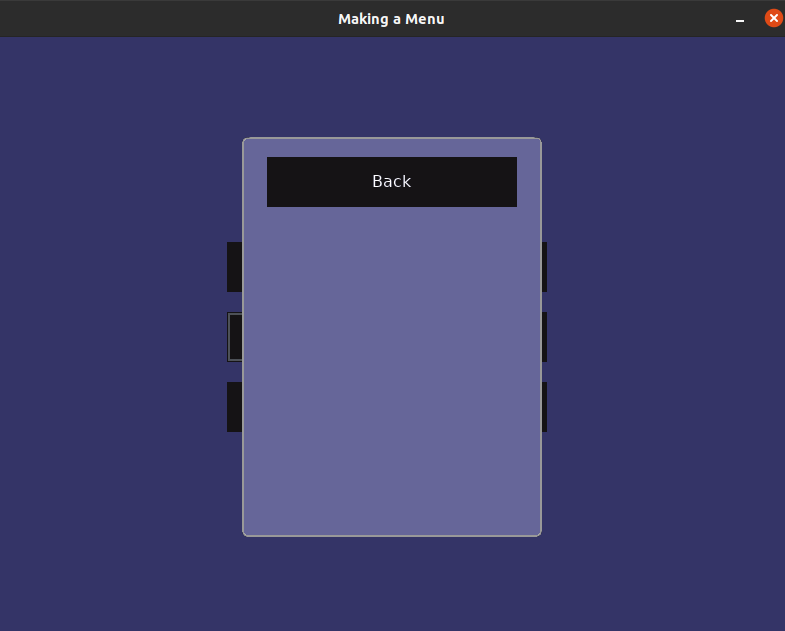
Now we need to implement an actual menu for volume and options, for that we have
to make a class that acts like a window. Using UIMouseFilterMixin we catch
all the events happening for the parent and respond nothing to them. Thus
making it act like a window/view.
class SubMenu(arcade.gui.UIMouseFilterMixin, arcade.gui.UIAnchorLayout):
    """Acts like a fake view/window."""

    def __init__(self, ):
        super().__init__(size_hint=(1, 1))

        # Setup frame which will act like the window.
        frame = self.add(arcade.gui.UIAnchorLayout(width=300, height=400, size_hint=None))
        frame.with_padding(all=20)

        # Add a background to the window.
        frame.with_background(texture=arcade.gui.NinePatchTexture(
            left=7,
            right=7,
            bottom=7,
            top=7,
            texture=arcade.load_texture(
                ":resources:gui_basic_assets/window/dark_blue_gray_panel.png"
            )
        ))

        back_button = arcade.gui.UIFlatButton(text="Back", width=250)
        # The type of event listener we used earlier for the button will not work here.
        back_button.on_click = self.on_click_back_button

        # Internal widget layout to handle widgets in this class.
        widget_layout = arcade.gui.UIBoxLayout(align="left", space_between=10)

        widget_layout.add(back_button)

        frame.add(child=widget_layout, anchor_x="center_x", anchor_y="top")

    def on_click_back_button(self, event):
        # Removes the widget from the manager.
        # After this the manager will respond to its events like it previously did.
        self.parent.remove(self)
We have got ourselves a fake window currently. We now, pair it up with the volume and options button to trigger it when they are clicked.
            arcade.exit()

        @volume_button.event("on_click")
        def on_click_volume_button(event):
            volume_menu = SubMenu()
            self.manager.add(
                volume_menu,
                layer=1
            )

        @options_button.event("on_click")
        def on_click_options_button(event):
            options_menu = SubMenu()
            self.manager.add(
                options_menu,
Program Listings#
menu_04.py Full Listing ← Where we are right now
menu_04.py Diff ← What we changed to get here
Step 5: Finalising the Fake Window aka the Sub Menu#

We finalise the menu or you can call it the last step!
Adding a Title label#
We will be adding a UILabel that explains the menu. UISpace is a widget
that can be used to add space around some widget, you can set its color to the
background color so it appears invisible.
        back_button = arcade.gui.UIFlatButton(text="Back", width=250)
        # The type of event listener we used earlier for the button will not work here.
        back_button.on_click = self.on_click_back_button
Adding it to the widget layout.
        style_dict = {"press": pressed_style, "normal": default_style, "hover": default_style, "disabled": default_style}
        # Configuring the styles is optional.
        slider = arcade.gui.UISlider(value=50, width=250, style=style_dict)
Adding a Input Field#
We will use UIInputText to add an input field. The with_border()
function creates a border around the widget with color(default argument is
black) black and thickness(default argument is 2px) 2px. Add this just below
the title label.
title_label = arcade.gui.UILabel(text=title, align="center", font_size=20, multiline=False)
Adding it to the widget layout.
        style_dict = {"press": pressed_style, "normal": default_style, "hover": default_style, "disabled": default_style}
        # Configuring the styles is optional.
        slider = arcade.gui.UISlider(value=50, width=250, style=style_dict)
If you paid attention when we defined the input_text variable we passed the
text parameter with our input_text_default argument. We basically added
those parameters in our sub menu so that it can be used by both volume and
options button, with texts respecting their names. We will repeat this again
in the last also for those of you who are skipping through this section :P.
Adding a Dropdown#
We add a dropdown by using UIDropdown.
        toggle_group = arcade.gui.UIBoxLayout(vertical=False, space_between=5)
        toggle_group.add(toggle)
Adding it to the widget layout.
widget_layout.add(title_label)
Adding a Slider#
The final widget. In arcade you can use UISlider to implement a slider.
Theres a functionality to style the slider, this is also present for
UIFlatButton and UITextureButton.
# Create dropdown with a specified default.
Adding it to the widget layout.
        widget_layout.add(title_label_space)
        widget_layout.add(input_text_widget)
Finishing touches#
As we mentioned earlier, to explain the use of those parameters to the class. We basically used them so it can be used by both options and volume as we wanted to have different text for both. For those who have read the full tutorial line-by-line; ‘They will never know’. :D. We also recommend to see the full code for this section.
Program Listings#
menu_05.py Full Listing ← Where we are right now
menu_05.py Diff ← What we changed to get here